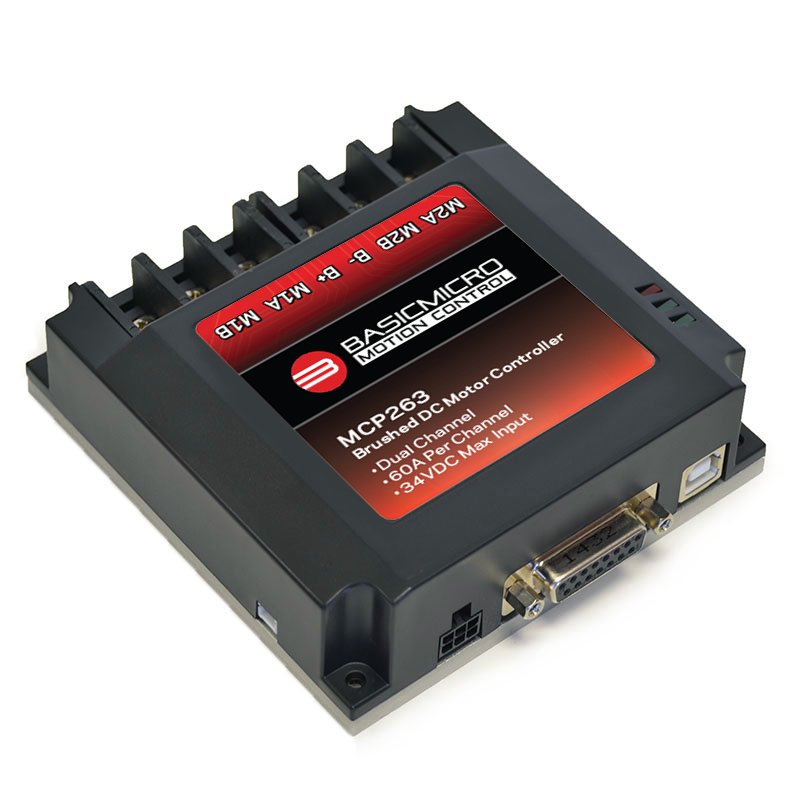
Figure 1: An MCP 263 motor controller.
Introduction
The MCP line of motor controllers feature the ability to store and run user-written programs to control all of the functionality of the controller. The language is called MCL and is a subset of the Basic programming language. This application note covers how to load and run a simple “Hello world” example that should be familiar to those with previous programming experience. For those without any programming experience the script should be simple and easy to understand. Future articles will dive deeper in to using the full feature set of the MCL language.
Materials
(1) MCP motor controller
(1) power source for MCP
(1) computer with Motion Studio and MCP driver installed
(1) USB B cable
(1) power source for MCP
(1) computer with Motion Studio and MCP driver installed
(1) USB B cable
Steps
1. Wire the power supply to the MCP by attaching the negative wire to the terminal marked “B-” and the positive wire to the terminal marked “B+”.
2. Using a USB B cable connect the MCP to the computer being used.
3. Power on the MCP by turning on the power supply if using a benchtop power supply or via a switch if using a battery. If a battery without a switch is being used the MCP is already powered on. Make sure the voltage of the power supply is within the voltage range of the MCP model in use.
4. Open Motion Studio on the computer in use and connect the MCP by clicking on “Connect Selected Unit” in the upper left-hand side of the application.
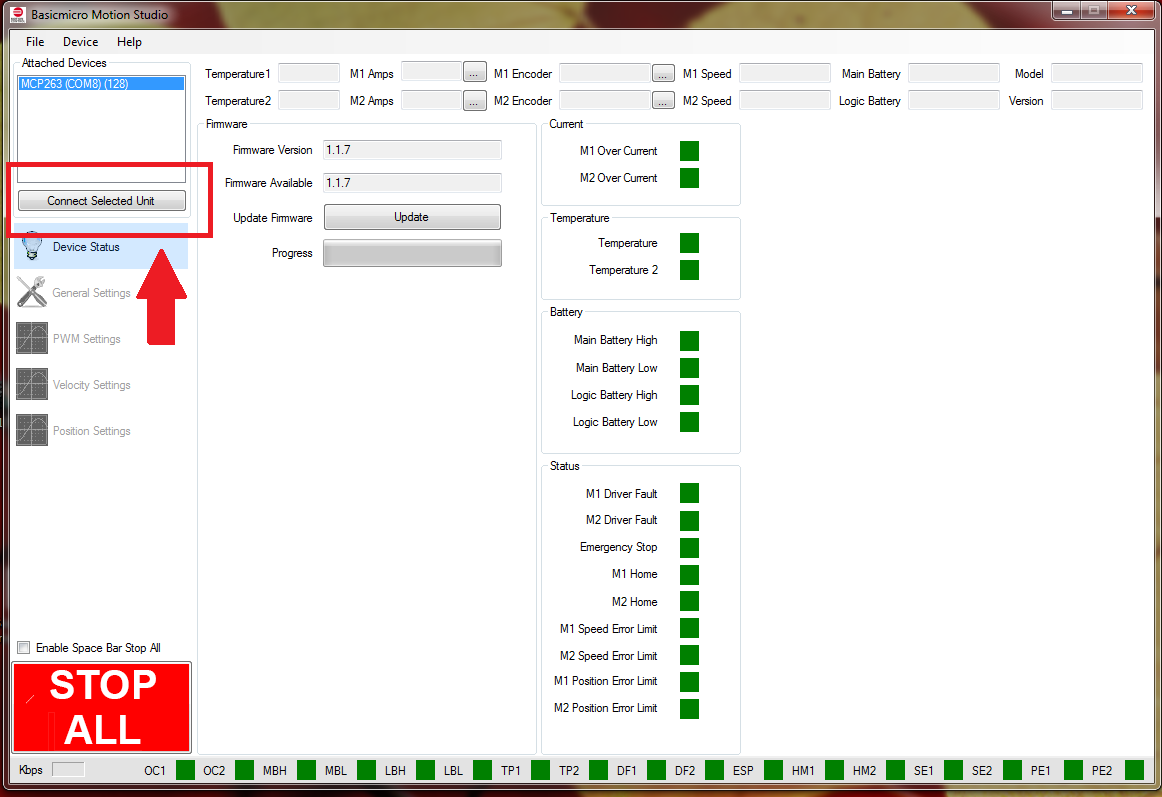
Figure 2: The location in Motion Studio to connect an MCP motor controller.
5. Set the USB mode the MCL serial by first clicking on “General Settings” on the left-hand side of Motion Studio. Locate the pane labeled “USB Settings”. Using the dropdown set the mode to “MCL Serial”.
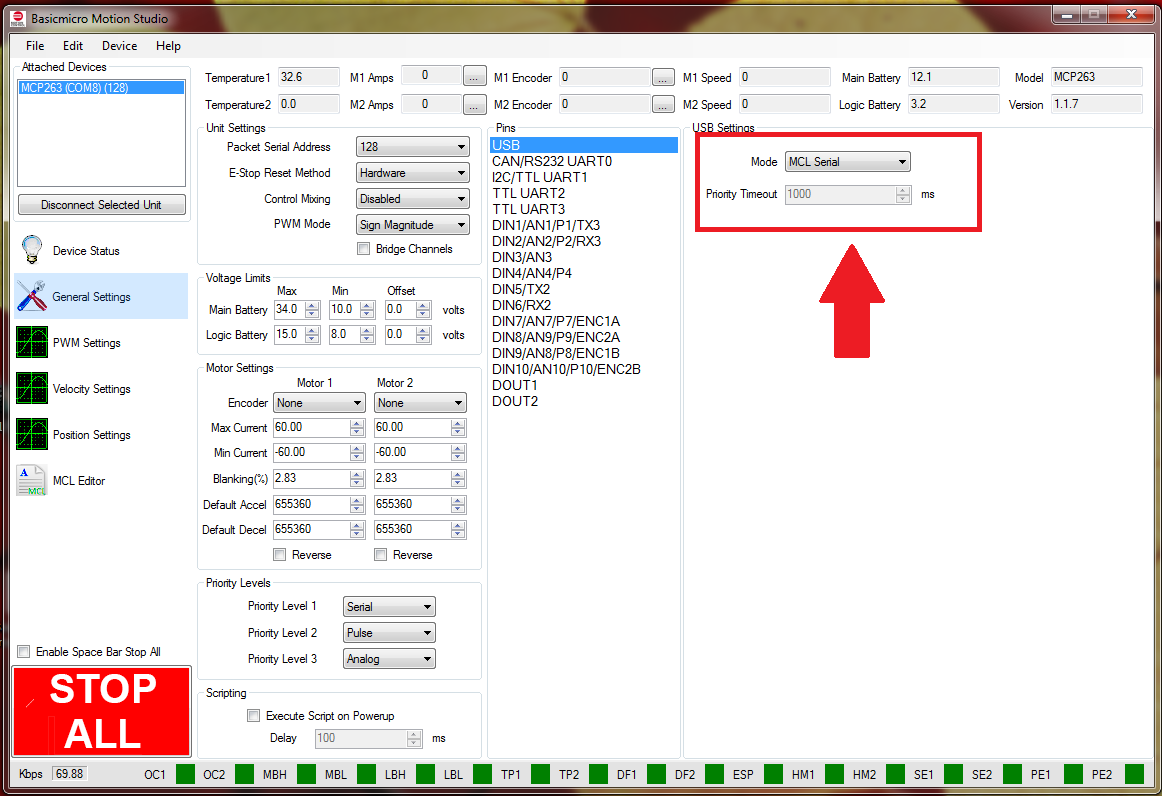
Figure 3: The location in the General Settings window to set the USB mode.
6. Download the example code from here or if Git is installed on the computer is use clone it by using the command below on the command line.
git clone https://github.com/basicmicro/mcp_mcl_scripting_hello_world.git
7. Next, the example file needs to be opened. Click on “MCL Editor” on the left-hand side of the application. At the top of the windows there is a folder icon that is used to open files. Click the icon and navigate to where to downloaded example code is located. Select the file named “hello.mcl” and click on “Open”.
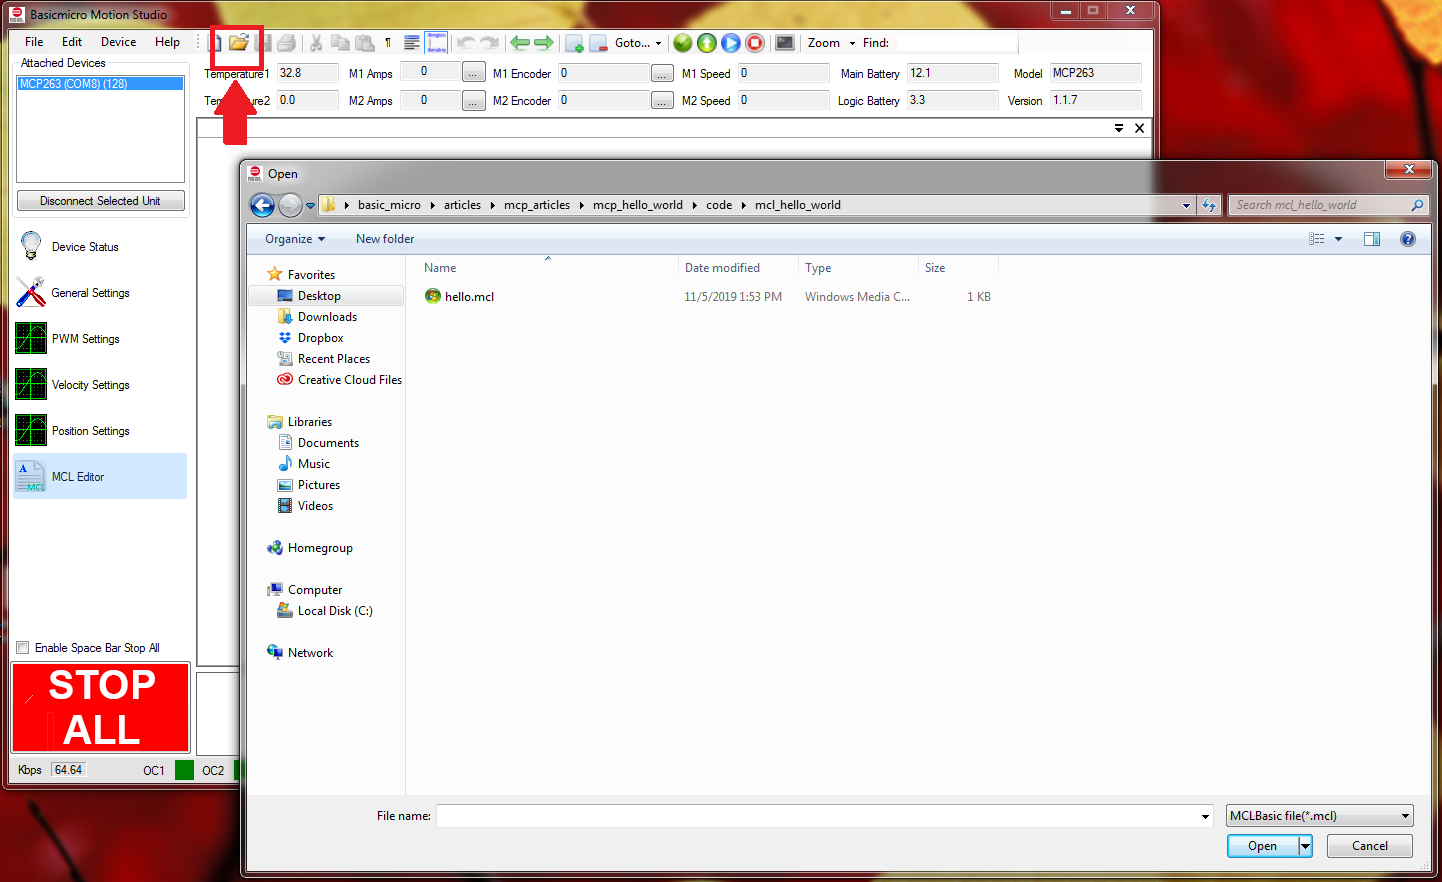
Figure 4: The location in the MCL editor to open an MCL script.
8. Before uploading and running code on the MCP the script must be checked for errors and converted to bytecode. Do this by clicking on the green checkmark icon at the top of the window. The alternative way of doing this is by clicking on “Device” in the menu at the top of the windows and then clicking on “Check MCL”.
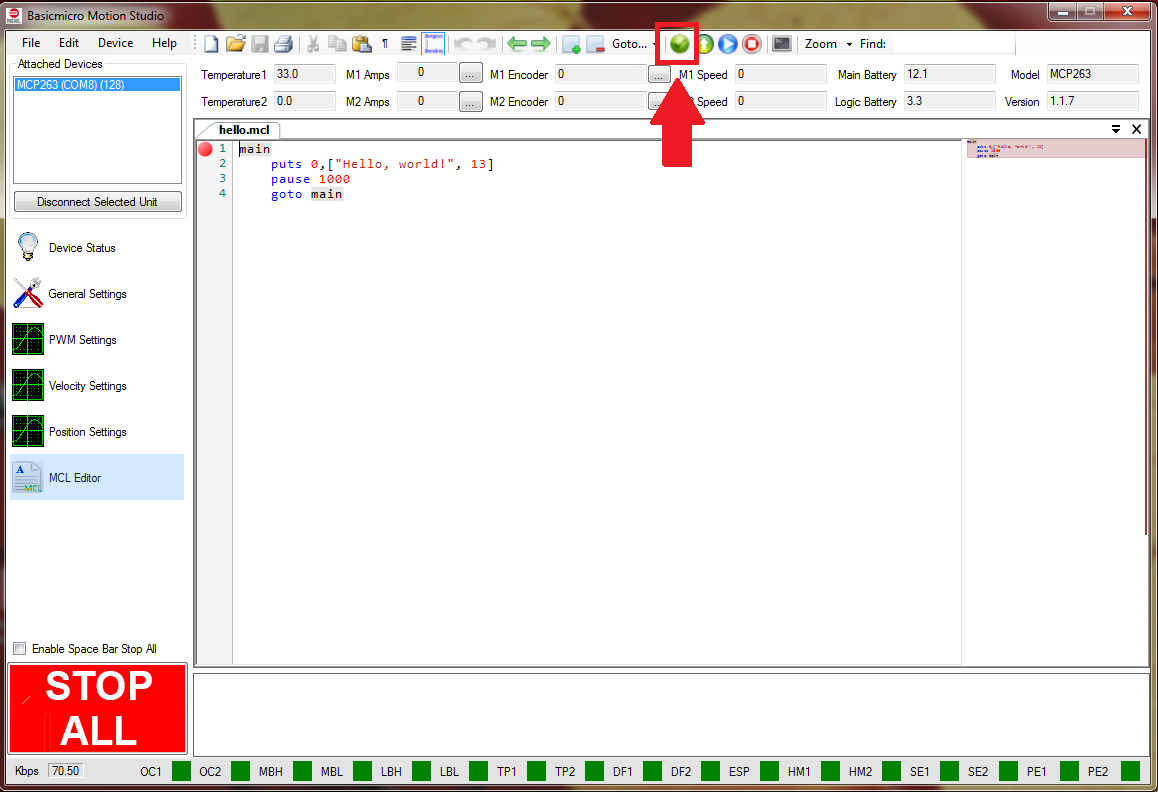
Figure 5: The location in the MCL editor to run a check on the MCL script.
9. The bytecode must now be sent to the MCP before running it. Click on the green up arrow icon at the top of the window to program the MCP. Alternatively, the same thing can be accomplished by clicking on “Device” in the menu at the top of the application and then clicking “Download MCL”.
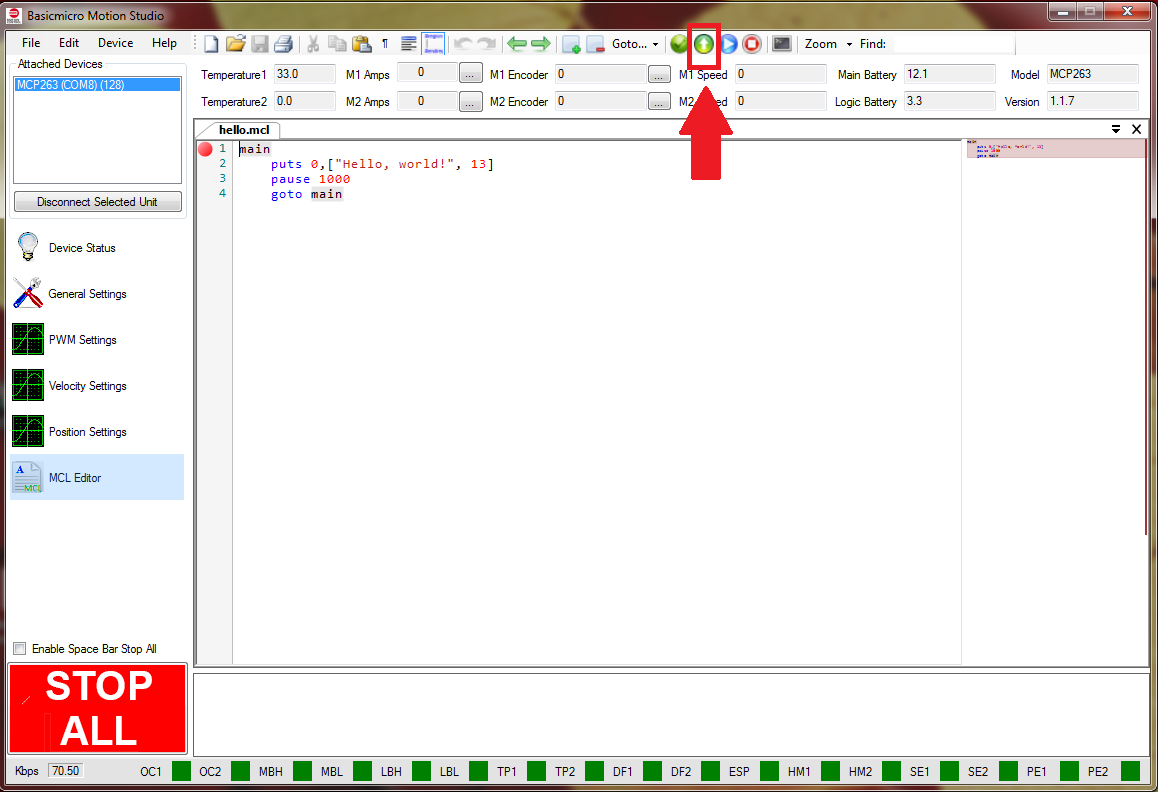
Figure 6: The location in the MCL editor to flash the script to the MCP.
10. To run the test script click on the blue arrow button at the top of the window. The script can also be started by clicking on “Device” in the menu at the top of the application and then clicking on “Start Script”.
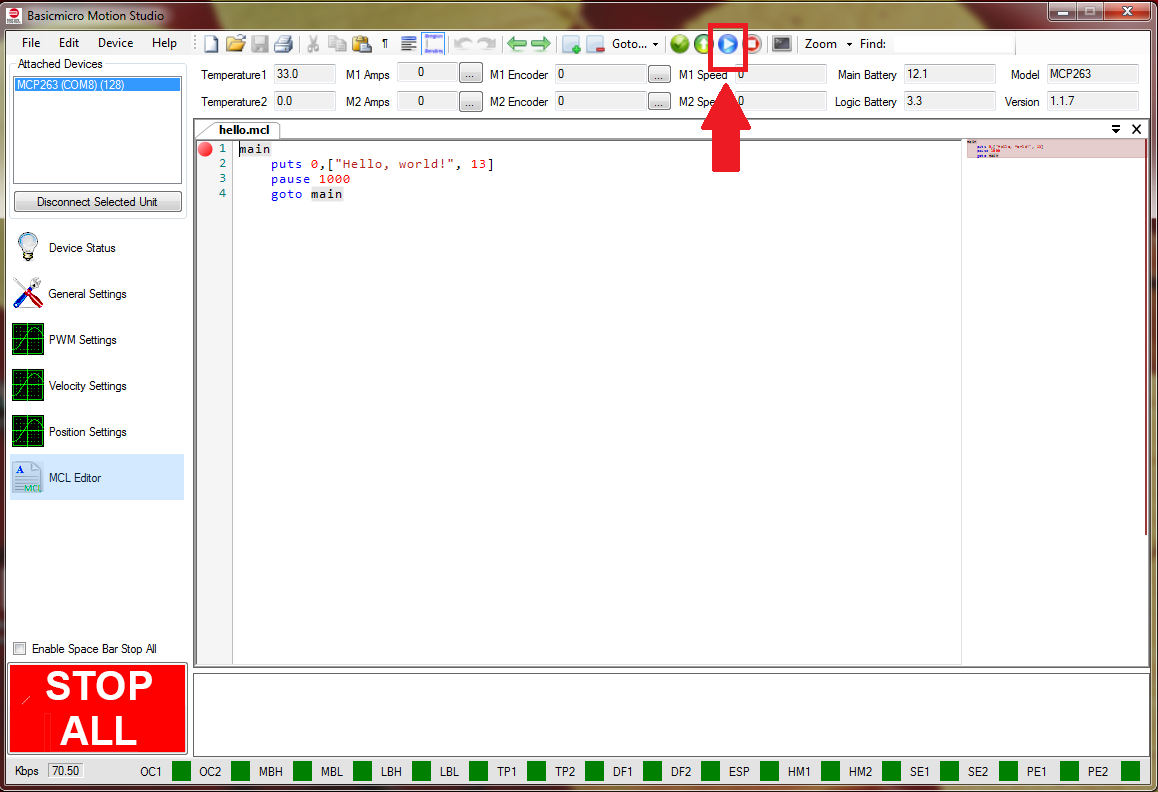
Figure 7: The location in the MCL editor to start the script.
11. To observe the output of the script click on the terminal icon at the top of the MCL editor window. In the terminal that opens the text “Hello, world!” is printed to the terminal once every second in a loop. Clicking the tab labeled “Text” will make it easier to see the text output of the hello world script.
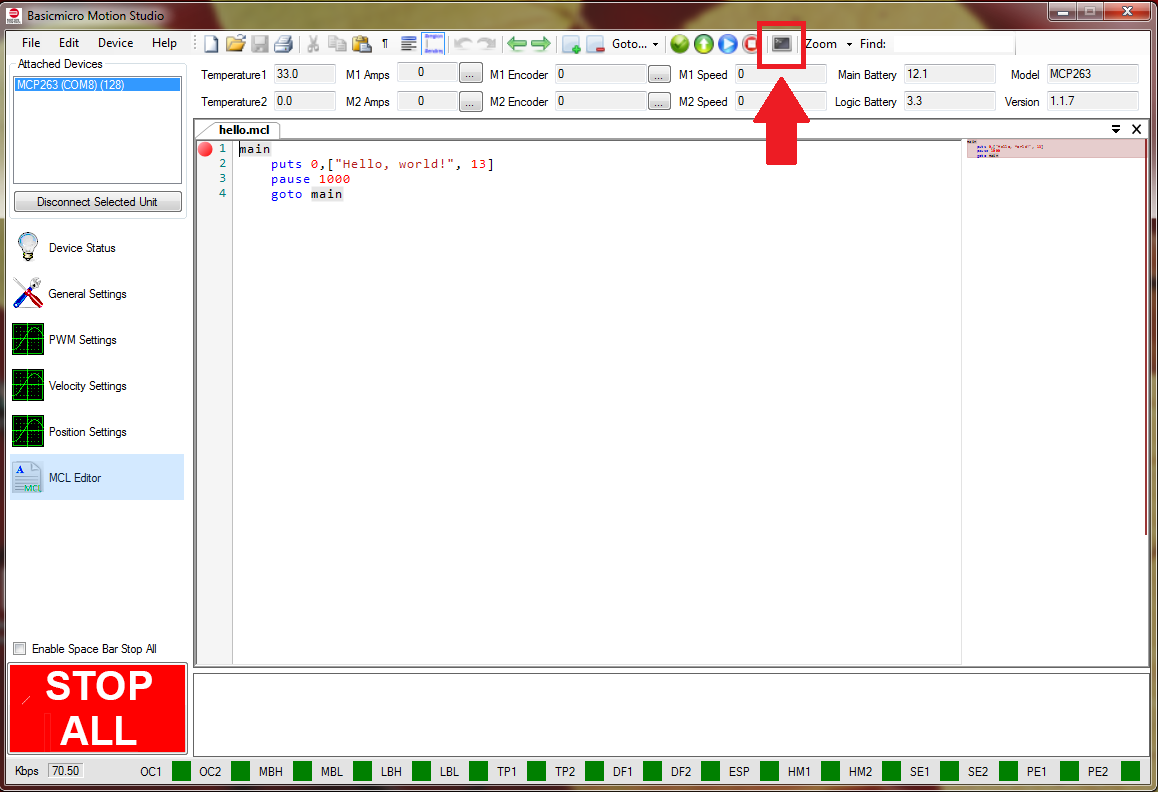
Figure 8: The location in the MCL editor to open the terminal window.
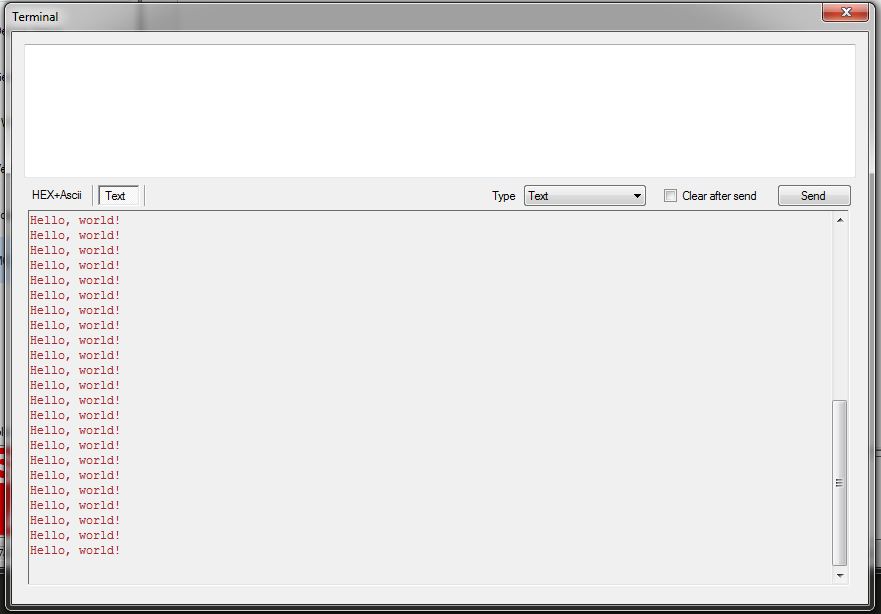
Figure 9: The output of the “Hello, world!” script in the terminal window.
Code Walkthrough
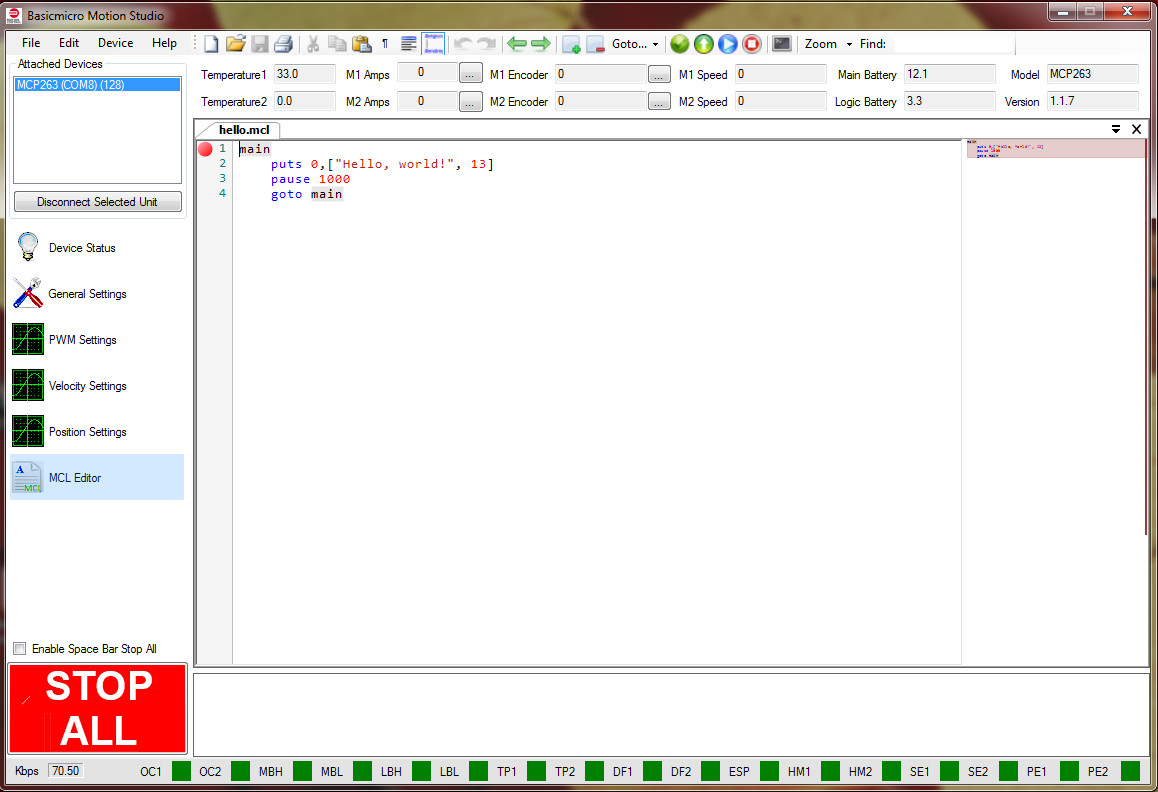
Figure 10: The example code in the MCL editor.
main
The single line of code is known as a label in the MCL scripting language. It’s used as a named location that can be jumped to with the use of a goto statement. In this script it’s used to form a loop in combination with a goto statement.
puts 0,[“Hello, world!”, 13]
The puts call writes to a stream, in this case the USB port, which is denoted by the use of a 0 in the call to puts. In the bracket is the string to be written as well as “13” which is a newline character. The string “Hello, world!” and the newline character are written to the stream and can be viewed in the MCL editor terminal.
pause 1000
The call to pause causes the script to pause, in this case for 1000 milliseconds which is 1 second.
goto main
Calling “goto main” causes the execution of the script to jump to the location of the label “main”. In this case the label is located at the beginning of the script which means the script runs repeatedly in an infinite loop.