Introduction
The Arduino library provided by BasicMicro is easy to use and simple to inlcude in Arduino sketches. This Application Note covers the use of the library and a description of the most commonly used functions it contains.
Dowloading the RoboClaw Arduino library
The RoboClaw Arduino library can be downloaded here. The library will need to be added to the Arduino IDE, this is explained in the next step.
Adding the RoboClaw library to the Arduino IDE
Note the location the RoboClaw library was downloaded to and then open the Arduino IDE. In the top menu click on “Sketch” and the go to “Include Library” and then “Add .Zip Library”. In the dialog box that opens select the downloaded .zip file and the click “Open”. The library has now been added to the Arduino installation and can be referenced from sketches.
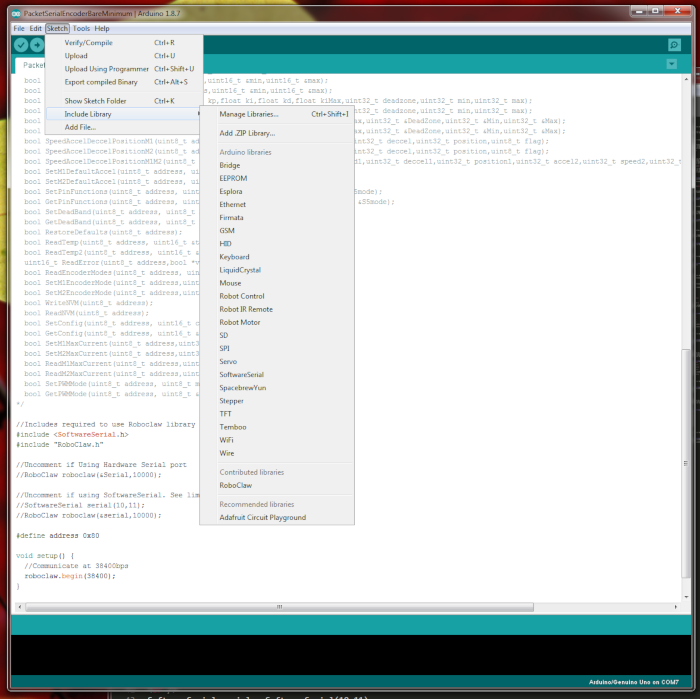
Figure 1: Adding the RoboClaw Library to the Arduino IDE.
Overview
There is a general scheme for using the RoboClaw library that should be followed. First a serial communication object must be created. This can be either an Arduino hardware or serial object. Then a RoboClaw object is created using the serial communication ohject and a timeout paramater. Communciation with the attached RoboClaw begins when the “begin()” function of the RoboClaw object is called. From here functions to control the RoboClaw are called on the RoboClaw object.
Creating a Serial Communications Object
As stated earlier the first part of using the library is creating an object for serial communication. With the Arduino one of two types can be created, either a software or harware serial object. In the case of hardware serial the object is ready to be used in your code, with software serial one must be created. Below is an example of creating a software serial object.
SoftwareSerial serial = SoftwareSerial(10,11);
Creating the RoboClaw Object
To create the RoboClaw object pass a pointer (name of the serial object prepended with ‘&’) to the serial object previusly created and a timeout value for serial communication.
Starting Communcation with the RoboClaw
Once a RoboClaw object has been created communication to the attached RoboClaw starts when the begin() function is called on it. The begin() function takes one parameter which is the baudrate for serial communication. This baudarte should match the one set via BasicMicro Motion Studio.
roboclaw.begin(38400);
Calling functions on the RoboClaw object
After the last step of calling begin() is completed the RoboClaw object is ready to use for controlling the attached RoboClaw. Functions can be called on the RoboClaw object at will. See below for an example.
roboclaw.ForwardM1(0x80,128);
Complete example
Below is a complete example of the code to control a RoboClaw, from setup to calling a function to control the RoboClaw.
#include <SoftwareSerial.h>
#include “RoboClaw.h”
// Create the serial communications object
SoftwareSerial serial = SoftwareSerial(10,11);
// Create the RoboClaw object
RoboClaw roboclaw = RoboClaw(&serial,10000);
// Start communicating with the RoboClaw hardware
roboclaw.begin(38400);
roboclaw.ForwardM1(0x80,128)
RoboClaw Library Functions
Operating Individual Motors
The functions below are used to control the speed and direction of individual motors. Address is the address of an individual RoboClaw as set in Motion Studio. Speed is a value between 0 and 127 used to set the speed of the motor.
BackwardM1(address,speed)
ForwardM2(address, speed)
BackwardM2(address,speed)
ForwardBackwardM1(address,speed)
ForwardBackwardM2(address,speed)
Below is an example of using one of these functions:
roboclaw.ForwardM1(0x80,64);
Mixed Mode Functions
The functions below are for using the RoboClaw when mixing is enabled. This is the type of drive setup that a tank-style robots uses. It is also refered to as differential drive. The ForwardsBackwards and LefRight functions take a value between 0 and 127 where half the max value is the divide between forwards/backwards and left/right. In all of the other functions the values between 0 and 127 denote min and max speed.
BackwardMixed(address,speed)
TurnRightMixed(address,speed)
TurnLeftMixed(address,speed)
ForwardBackwardMixed(address,speed)
LeftRightMixed(address,speed)
Below is an example of using one of these functions:
roboclaw.ForwardMixed(0x80,64);
Encoder Functions
The functions below are for using for reading encoder values and setting encoder values. The read functions return a 32-bit value and a long int should be used to store the value. The set functions take a 32-bit value as their parameter.
ReadEncM2(address);
SetEncM1(address,val);
SetEncM2(address,val);
ReadSpeedM1(address);
ReadSpeedM2(address);
ResetEncoders(address);
Below is an example of using one of these functions:
long encoder_1_count = roboclaw.ReadEncM1(0x80);
Distance Functions
The functions below are used to move attached motors a specific distance. Address is the address of the RoboClaw to control. Speed is the
speed of the motor in quadrature pulses per second. Distance is the distance to move in quadrate counts. Flag controls whether the command is executed immediately or stored until any previous commands are finished. A buffer value of 0 stores the command and a value of 1 executes the distance command immediately. Accel sets the acceleration for the motor. M1 in the function name means in controls motor channel 1 and M2 means that it controls motor channel 2. Functions with M1 and M2 in their name can be used to control both motors at the same time.
SpeedDistanceM2(address, speed, distance, flag)
SpeedDistanceM1M2(address, speed1, distance1, speed2, distance2, flag)
SpeedAccelDistanceM1(address, accel, speed, distance, flag)
SpeedAccelDistanceM2(address, accel, speed, distance, flag)
SpeedAccelDistanceM1M2(address, accel, speed1, distance1, speed2, distance2, flag)
Position Functions
The functions below are used for motor positioning. Address is the address of the RoboClaw to control. Accel and deccel set the accelearation and decceleration of the motor. Speed set the speed of the motor in quadrate pulses per second. Position set the position of the motor in encoder counts. Flag controls whether the command is executed immediately or stored until any previous commands are finished. A buffer value of 0 stores the command and a value of 1 executes the distance command immediately. nM1 in the function name means in controls motor channel 1 and M2 means that it controls motor channel 2. Functions with M1 and M2 in their name can be used to control both motors at the same time.
peedAccelDeccelPositionM2(address, accel, speed, deccel, position, flag)
SpeedAccelDeccelPositionM1M2(address, accel1, speed1, deccel1, position1, accel2, speed2, deccel2, position2, flag)