Serial communication is one of the many control methods that can be used with the RoboClaw motor controller. Most microcontrollers on the market include serial ports as part of their set of peripherals. The ever popular Arduino is one such microcontroller. Every Arduino model includes at least one hardware serial port and several models feature more than that. When using an Arduino there are two common ways to use serial, one uses the actual serial port hardware and the other uses software to emulate serial hardware. This Application Note looks at using the hardware based serial mode of Arduino microcontrollers.
While software serial has the advantage of being able to use pins besides the dedicated serial pins there are quite a few ways and scenarios in which hardware serial is a better option. When using baudrates above 9600 bps hardware serial is the best option as timing issues become an issue with software serial above this rate.
Also, if an Arduino sketch uses hardware interrupts hardware serial is the only choice for serial communication because the interrupts used by software serial can interfere with other interrupts used. This may results in other interrupts not being caught and serviced and the sketch as a whole to not run properly. Note that this problem not only results in user defined interrupts not being caught, but also those in any library used in the sketch.
When using hardware serial the dedicated hardware serial pins must be used, they are the only option in this mode unlike with software serial. The pins for serial hardware usage are labeled on the Arduino board as “RX” and “TX”. If the board has more than one hardware serial port the “RX” and “TX” pins are also numbered.
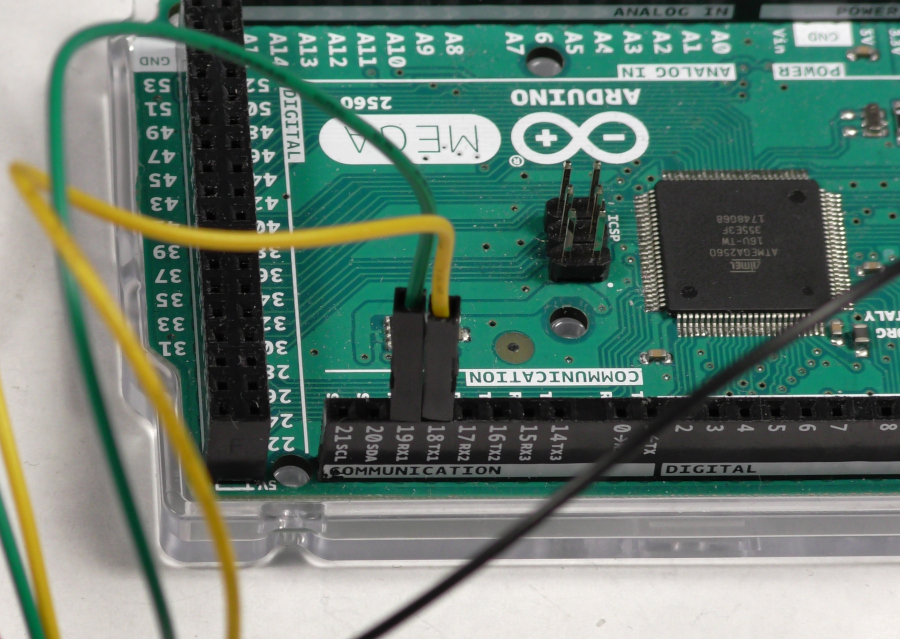
Figure 1: Image showing the labeled serial RX and TX pins.
Using Hardware Serial with the RoboClaw Library
Include the RoboClaw Library
The first step to using hardware serial is to include the RoboClaw library. The code snippet below shows how to do this. This should be added at the top of the file where other include statements are made.
#include “RoboClaw.h”
Note the Predefined Serial Port Objects
When using hardware serial there is no need to create the serial object as they have already been created in the Arduino base library. The names of the hardware serial objects are standard between all models of Arduinos. Each available hardware serial port has a pre-defined name. See the list below for the names.
Serial // Used to reference the first hardware serial port on an Arduino
Serial1 // Used to reference the second hardware serial port on an Arduino
Serial2 // Used to reference the third hardware serial port on an Arduino
Serial3 // Used to reference the fourth hardware serial port on an Arduino
Serial1 // Used to reference the second hardware serial port on an Arduino
Serial2 // Used to reference the third hardware serial port on an Arduino
Serial3 // Used to reference the fourth hardware serial port on an Arduino
Create the RoboClaw Object, Passing the Serial Port Pointer
Next, the RoboClaw object must be created and a reference to the serial port being used is passed to the constructor. Note that that a pointer to the serial port must be passed, not simply the name of the serial port. This is done by putting an “&” character in front of the serial port’s name. If this is not done the program will not work properly. The second values passed to the constructor is the timeout value for serial comms.
RoboClaw roboclaw = RoboClaw(&Serial, 10000);
Start Serial Communication
The last step before using the serial port to talk to a RoboClaw is starting serial communication between the Arduino and the motor controller. This is done by calling the “begin()” method of the previously created RoboClaw object. The desired baudrate is the only value passed to the method, this baudrate must match the baudrate set on the RoboClaw with Motion Studio. See the code snippet below for an example of doing this.
roboclaw.begin(38400);
Call Functions on the RoboClaw Object
After all of the previous steps have been completed the RoboClaw object can now be used to control the motor controller. Functions available in the RoboClaw library can now be called on the RoboClaw object. See the code snippet below for an example.
roboclaw.ForwardM1(0x80,127);
Complete Example
// Include the RoboClaw library
#include “RoboClaw.h”
// Create the RoboClaw object, passing the pointer to the hardware serial object
// and the serial timeout value
roboclaw = RoboClaw(&Serial, 10000);
void setup() {
// Begin serial communication at the given baudrate
roboclaw.begin(38400);
}
void loop()
{
// Call a method of RoboClaw object to control the motor controller
roboclaw.ForwardM1(0x80, 127);
delay(2000);
roboclaw.ForwardM1(0x80, 0);
delay(2000);
}